WebGL: a simple shader
By Erik Möller, Chris Mills
Originally published June 27, 2012
Summary
This article explains how to create a simple shader, building on the example created in the getting started with WebGL article.
Introduction
In the last part of this article series — getting started with WebGL, we introduced you to the world of writing raw WebGL (look ma, no libraries). We got you set up and showed you how to create a couple of very basic examples along with some simple error handling, and we explained basic concepts such as the WebGL rendering pipeline.
In this article, we will carry on where we left off, going further with the same example file and building up a simple shader. This article is a transcript of time 22:26 to 32.36 in Erik Möller’s WebGL 101 tutorial, available on YouTube.
Note: Access the full WebGL 101 code example set and links to see the examples running live, at Github
Making a rectangle out of our triangle
To build up this example step by step, start with the minimal draw code from the last article and follow the steps below. You can also view the minimal draw example from the full WebGL 101 code example set to see what the code so far does, and view the minimal shader example 03-minimal-shader.html also from the full WebGL 101 code example set to see what the end result from this tutorial will be.
First of all, make a copy of the 02-minimal-draw.html file, and save it as 03-minimal-shader.html (or something else of your choosing). In this tutorial we are going to forget about triangles, and instead draw a rectangle that will cover the canvas. To show what we will draw, replace the ascii triangle we currently have in our code with a square, like this:
/*
2 ___ 3
 |\  |
 | \ |
0|__\|1

*/
Note that in this context we are always using clip space coordinates, hence the values always ranging from -1 to 1. The next thing we want to do is input this data into our vertices array. Change the var vertices line (the fifth line of script) to read like so:
var vertices = [-1, -1, 1, -1, -1, 1, 1, 1];
Next, we take our gl.drawArrays line (the bottom line of script) and change it to use TRIANGLE_STRIP to dictate the shape to be drawn, instead of TRIANGLES — this works for our purposes here because the shape we are drawing is made from a strip of triangles. We will give TRIANGLE_STRIP four vertices, so the last number needs to be changed from 3 to 4.
gl.drawArrays(gl.TRIANGLE_STRIP, 0, 4);
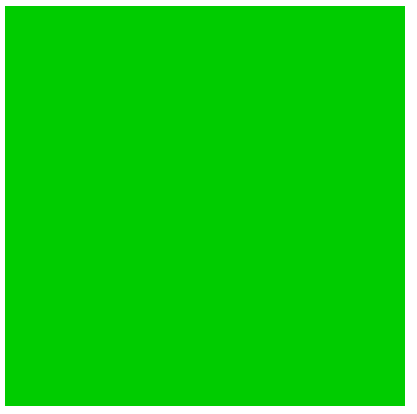
These changes will result in our exciting green triangle being changed into an even more exciting green rectangle — see Figure 1!

Figure 1: An exciting green rectangle, rendered using WebGL.
Making our example more flexible
At the moment, we have some hard-coded data to define features of the shape, such as the colour, size and number of items. Let’s make this more flexible, defining these in the buffer instead. First of all, add the following lines below the gl.bufferData line (just above the ascii square):
vertexPosBuffer.itemSize = 2;
 vertexPosBuffer.numItems = 4;
Now, replace the hard coded values from the last two lines of script with these properties:
gl.vertexAttribPointer(program.vertexPosAttrib, vertexPosBuffer.itemSize, gl.FLOAT, false, 0, 0);
 gl.drawArrays(gl.TRIANGLE_STRIP, 0, vertexPosBuffer.numItems);
This is good, as it makes the code more generic, and able to handle drawing a wider variety of shapes more easily.
Improving the shaders
The shaders are currently written inside strings, which is awkward to work with. To improve this, we will put them inside their own <script> elements. Put two new <script> elements in between the two existing ones, one for the vertex shader and one for the fragment shader. Give them ids and types as shown:
<script id="vshader" type="text/plain">
 </script>
 <script id="fshader" type="text/plain">
 </script>
Now let’s add the code for our shaders inside each <script> element. First, put this inside the vertex shader element:
attribute vec2 aVertexPosition;
 varying vec2 vTexCoord;
 void main() {
   vTexCoord = aVertexPosition;
   gl_Position = vec4(aVertexPosition, 0, 1);
 }
The first two lines declare the optional input and output to the shader. gl_Position is the mandatory output from a vertex shader — this contains the clip space vertices passed on to the rasterization step. In main() we just pass the input vertex positions on to the two outputs. Bear in mind that gl_Position is a vec4 therefore we need to add two components.
Now let’s build the fragment shader, inside the second <script> element:
precision mediump float;
 varying vec2 vTexCoord;
 void main() {
   gl_FragColor = vec4(vTexCoord, 0, 1);
 }
Here we set the precision of any float variables in the shader. Like the gl_Position in the vertex shader, the fragment shader has a mandatory output called gl_FragColor that tells the graphic library which colour to draw the fragment in. Here we use the two components of vTexCoord for the red and green components, set the blue component to 0, and the alpha component to 1.
Because we’ve moved our shaders out to different element positions, we need to change references to them in the main code. Delete the two old lines that contain the shaders as strings (the ones that start var vs and var fs) and replace them with the following code:
var vs = document.getElementById('vshader').textContent;
 var fs = document.getElementById('fshader').textContent;
these just grab the content of the <script> elements containing the shaders as strings. We also need to change the program.vertexPosAttrib line a couple of lines below to read like so:
program.vertexPosAttrib = gl.getAttribLocation(program, 'aVertexPosition');
This makes our program use the information from the shaders.
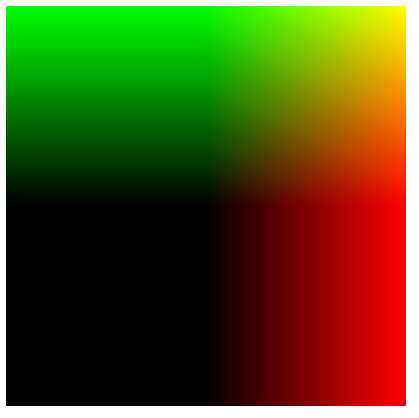
Now try testing your code — you should end up with an altogether more colourful rectangle, as shown in Figure 2:

Figure 2: Our rectangle now has a much more exciting look to it.
Offsetting the texture coordinates
Now let’s look at how to offset our texture coordinates. To start with, we will add a uniform to our vertex shader — this is a constant that is passed into the shader. Add the following line into the vshader <script> element, below the varying... line:
uniform vec2 uOffset;
Unlike the attributes, which are per vertex data, the uniform is just a constant that is passed into the program. To pass this in, let’s create an offset array, just below the 2nd line of the main program (the var gl line):
var offset = [1,1];
we will add this to the texture coord of each vertex, meaning that they now go between 0 and 1, not -1 and 1. We now need to reference the location of the uniform, just like we already reference the attribute location with Program.vertexPosAttrib. Below the Program.vertexPosAttrib line near the bottom of the code, add the following:
program.offsetUniform = gl.getUniformLocation(program, 'uOffset');
We’ll then set that uniform, using uniform2f — add the following line just above the gl.drawArrays line in the main code:
gl.uniform2f(program.offsetUniform, offset[0], offset[1]);
The offsetUniform identifies which variable from inside the shaders the values should be tied to: in this case the uOffset, which is a vec2. The last step is to add the uOffset to the first line inside your void main() function:
vTexCoord = aVertexPosition + uOffset;
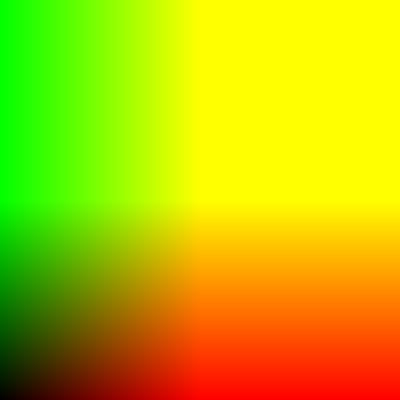
This should now offset the gradient and give us an altogether more yellowy look, as seen in Figure 3:

Figure 3: Offsetting the gradient texture gives us a nicer, more yellowy effect.
Reusing code
Now let’s have a look at putting some of our reusable code into a utility file so we can make it available easily wherever we need. Take the whole of the following code chunk that generates our Quad:
var vertexPosBuffer = gl.createBuffer();
 gl.bindBuffer(gl.ARRAY_BUFFER, vertexPosBuffer);
 var vertices = [-1, -1, 1, -1, -1, 1, 1, 1];
 gl.bufferData(gl.ARRAY_BUFFER, new Float32Array(vertices), gl.STATIC_DRAW);
 vertexPosBuffer.itemSize = 2;
 vertexPosBuffer.numItems = 4;
/*

2 ___ 3
 |\  |
 | \ |
0|__\|1

*/
and put it into your webgl-utils.js file, at the bottom, wrapped in a function called screenQuad() { ... }. At the bottom of this function, return vertexPosBuffer, like this:
return vertexPosBuffer;
Where the quad generation code once sat once sat in your main code, put the following line to reference it:
var vertexPosBuffer = screenQuad();
Attributions
This content was originally published on DevOpera, Opera's Developer Network. .